

Aircraft Polishing Tools & Aviation Buffing Equipment
Precision Tools for Professional Aviation Brightwork
At Lucid Aero, we don’t just detail aircraft — we equip aviation professionals with the tools to achieve the same flawless finish. Each product we carry has been carefully selected, tested, and trusted by our own detailing team, ensuring performance that meets the highest aviation standards.
Now shipping to customers across the United States.
Engineered for Brightwork & Tight Spaces
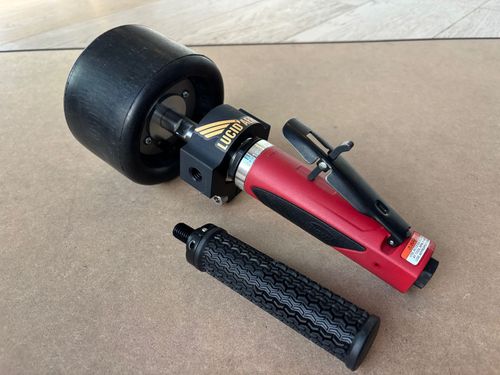
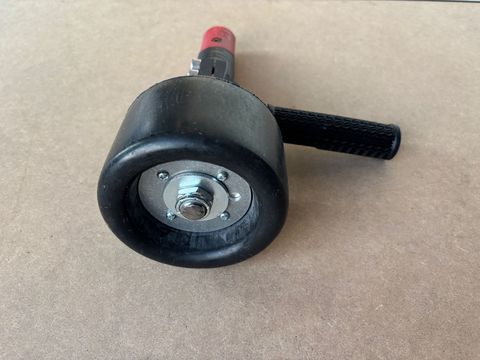
Lucid Aero Compact Aircraft Drum Buffer
Our compact drum buffer is designed specifically for aviation detailing, making it the perfect tool for polishing leading edges, engine inlets, and complex curved surfaces on aircraft like Cessna Citations and light jets. Its smaller form factor provides unmatched control and maneuverability where traditional buffers fall short.
Key Features:
- Compact size ideal for confined or contoured surfaces
- Powerful yet precise motor for professional-grade polishing
- Lightweight design for reduced fatigue during extended use
- Tested and trusted by Lucid Aero’s detailing team
Perfect For:
- Brightwork polishing
- Engine inlet restoration
- Leading edges and hard-to-reach areas
Specifications
Free Speed (RPM): 8000
Motor (HP): 1
Power (KW): 0.75
Length (IN.): 12
Length (MM): 305
Max Air Consumption(CFM): 35
Exhaust: Rear
Air Inlet Size: 1/4"NPT
Recommended Hose Size 3/8" (10mm)
Performance rated @ 90 psig(6.2 Bar) air pressure
Set Up
1. Before You Begin
- Read all safety information provided with this product.
- Ensure you are familiar with the operation of pneumatic tools.
- Verify that your air supply is capable of providing clean, dry air.
- Wear appropriate personal protective equipment:
- Eye protection (ANSI Z87.1 recommended)
- Hearing protection
2. Lubrication (Required)
- Use air tool oil only.
- Before connecting the air hose:
- Add 2–3 drops of air tool oil directly into the air inlet, (or)
- Ensure an inline oiler is installed and properly adjusted.
- Proper lubrication is required for smooth operation and motor longevity.
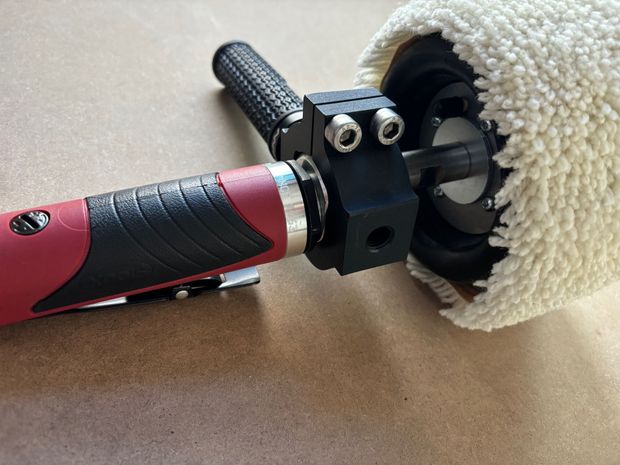
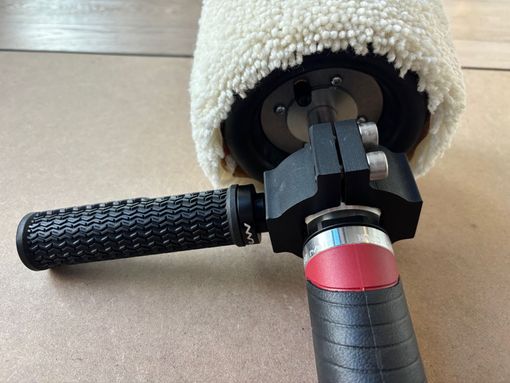
3. Buffing Pad Installation
- Ensure the pneumatic drum is fully deflated.
- Slide the selected buffing pad onto the drum.
- Center the pad evenly on the drum to ensure balance.
- Inflate the drum to no more than 15 PSI.
- Use only enough pressure to securely retain the pad.
- Do not exceed the maximum inflation pressure.
4. Support Handle Installation & Adjustment
- Install the support handle bracket on either the left or right side, based on operator preference.
- Choose throttle orientation: Throttle above the handle (thumb operation), (or) Throttle below the handle (index finger operation).
- Thread the handle rod into the bracket until fully seated.
- Ensure the grip is secure and does not rotate during use.
- Do not over-tighten handle or bracket hardware.
- Excessive torque may damage the drive housing or internal bearings.
5. Air Connection
- Confirm the throttle is not engaged and returns freely to the off position.
- The motor air inlet is ¼-inch NPT female.
- Install an air fitting compatible with your system.
- A swivel fitting is recommended to reduce hose strain.
- Do not over-tighten air fittings.
- If using thread sealant or Teflon tape, ensure no loose material can enter the motor.
6. Regulator Setup
- Ensure the regulator is in the OFF position (fully counter-clockwise).
- Connect the air hose to the tool.
- Start with the regulator fully closed.
- Gradually open the regulator while observing tool speed.
- Typical operating speed is 3,000–4,000 RPM.
- Adjust regulator output based on:
- Hose diameter
- Hose length
- Compressor capacity
Do not exceed 4,000 RPM.
Operations
1. Operating the Drum Buffer
1. Verify:
- Pad is secure and centered
- Handle is firmly attached
- Air fittings are secure
2. Position the buffer on the work surface before engaging the throttle.
3. Apply light, controlled pressure.
4. Allow the tool and pad to do the work.
5. Avoid forcing the buffer into the surface.
6. Maintain smooth, overlapping passes.
2. End of Use Procedure
- Disengage the throttle.
- Turn the regulator fully off.
- Disconnect the air supply.
- Release all air pressure from the pneumatic drum.
- Inspect the pad and drum for wear or damage.
3. Maintenance & Care
- Clean buffing pads as required.
- Inspect pads regularly for wear or damage.
- Lubricate the motor with air tool oil as part of routine use.
- Store the tool in a clean, dry environment.
4. Stop Use Immediately If
- Excessive vibration occurs
- The tool behaves erratically
- Unusual noise is present
- Control is reduced or unstable
Discontinue use and contact Lucid Aero before resuming operation.
5. Support
If you have questions about setup, operation, or maintenance, contact Lucid Aero by Phone at 236-705-8243 or at Support@Lucid-Aero.com
Safety Warnings
Safety WarningsRead and Understand These Safety Instructions Before Operating this Tool.
Improper use of this pneumatic drum buffer can result in serious injury or Death.
Warranty
For one year following the date of purchase, Lucid Aero will repair or replace, at Lucid Aero's option, any part that is defective in material or workmanship. Additional information can be found Here.
Documentation
DownloadsPaperwork for the Drum Buffer can be found here:
Quality Pads for a Mirror Finish
Wool & Cotton Buffing Pads for Aircraft Polishing
Paired with our compact drum buffer, our wool and cotton buffing pads are designed for maximum efficiency and durability. These pads deliver a flawless polish on metal surfaces, helping you achieve the mirror-like finish that makes brightwork stand out.
Key Features:
- Aviation-approved materials for safety and reliability
- Wool pads for heavy cutting and oxidation removal
- Cotton pads for fine polishing and a streak-free finish
- Long-lasting durability for professional use
Perfect For:
- Polished aluminum and stainless steel surfaces
- Step-by-step brightwork restoration processes